
An assault vest (plate carrier) is not just a gear carrier for military personnel, law enforcement or professional users. A correctly adjusted vest increases mobility, distributes weight evenly and allows fast access to critical equipment. A poorly adjusted vest, on the other hand, loads the body during prolonged use, makes breathing difficult and slows reaction time. This is why the question of how to wear a plate carrier and how to adjust it to the body is a fundamental step for both performance and safety.
Modern assault vests offer user specific ergonomics thanks to their compatibility with different plate sizes, MOLLE/PALS systems and adjustable shoulder, chest and waist structures. The way the vest sits on the body is set through three main adjustments: shoulder height, chest circumference and waist tension. The balance between these three prevents the vest from shifting or swinging excessively even in the most demanding operational environments.

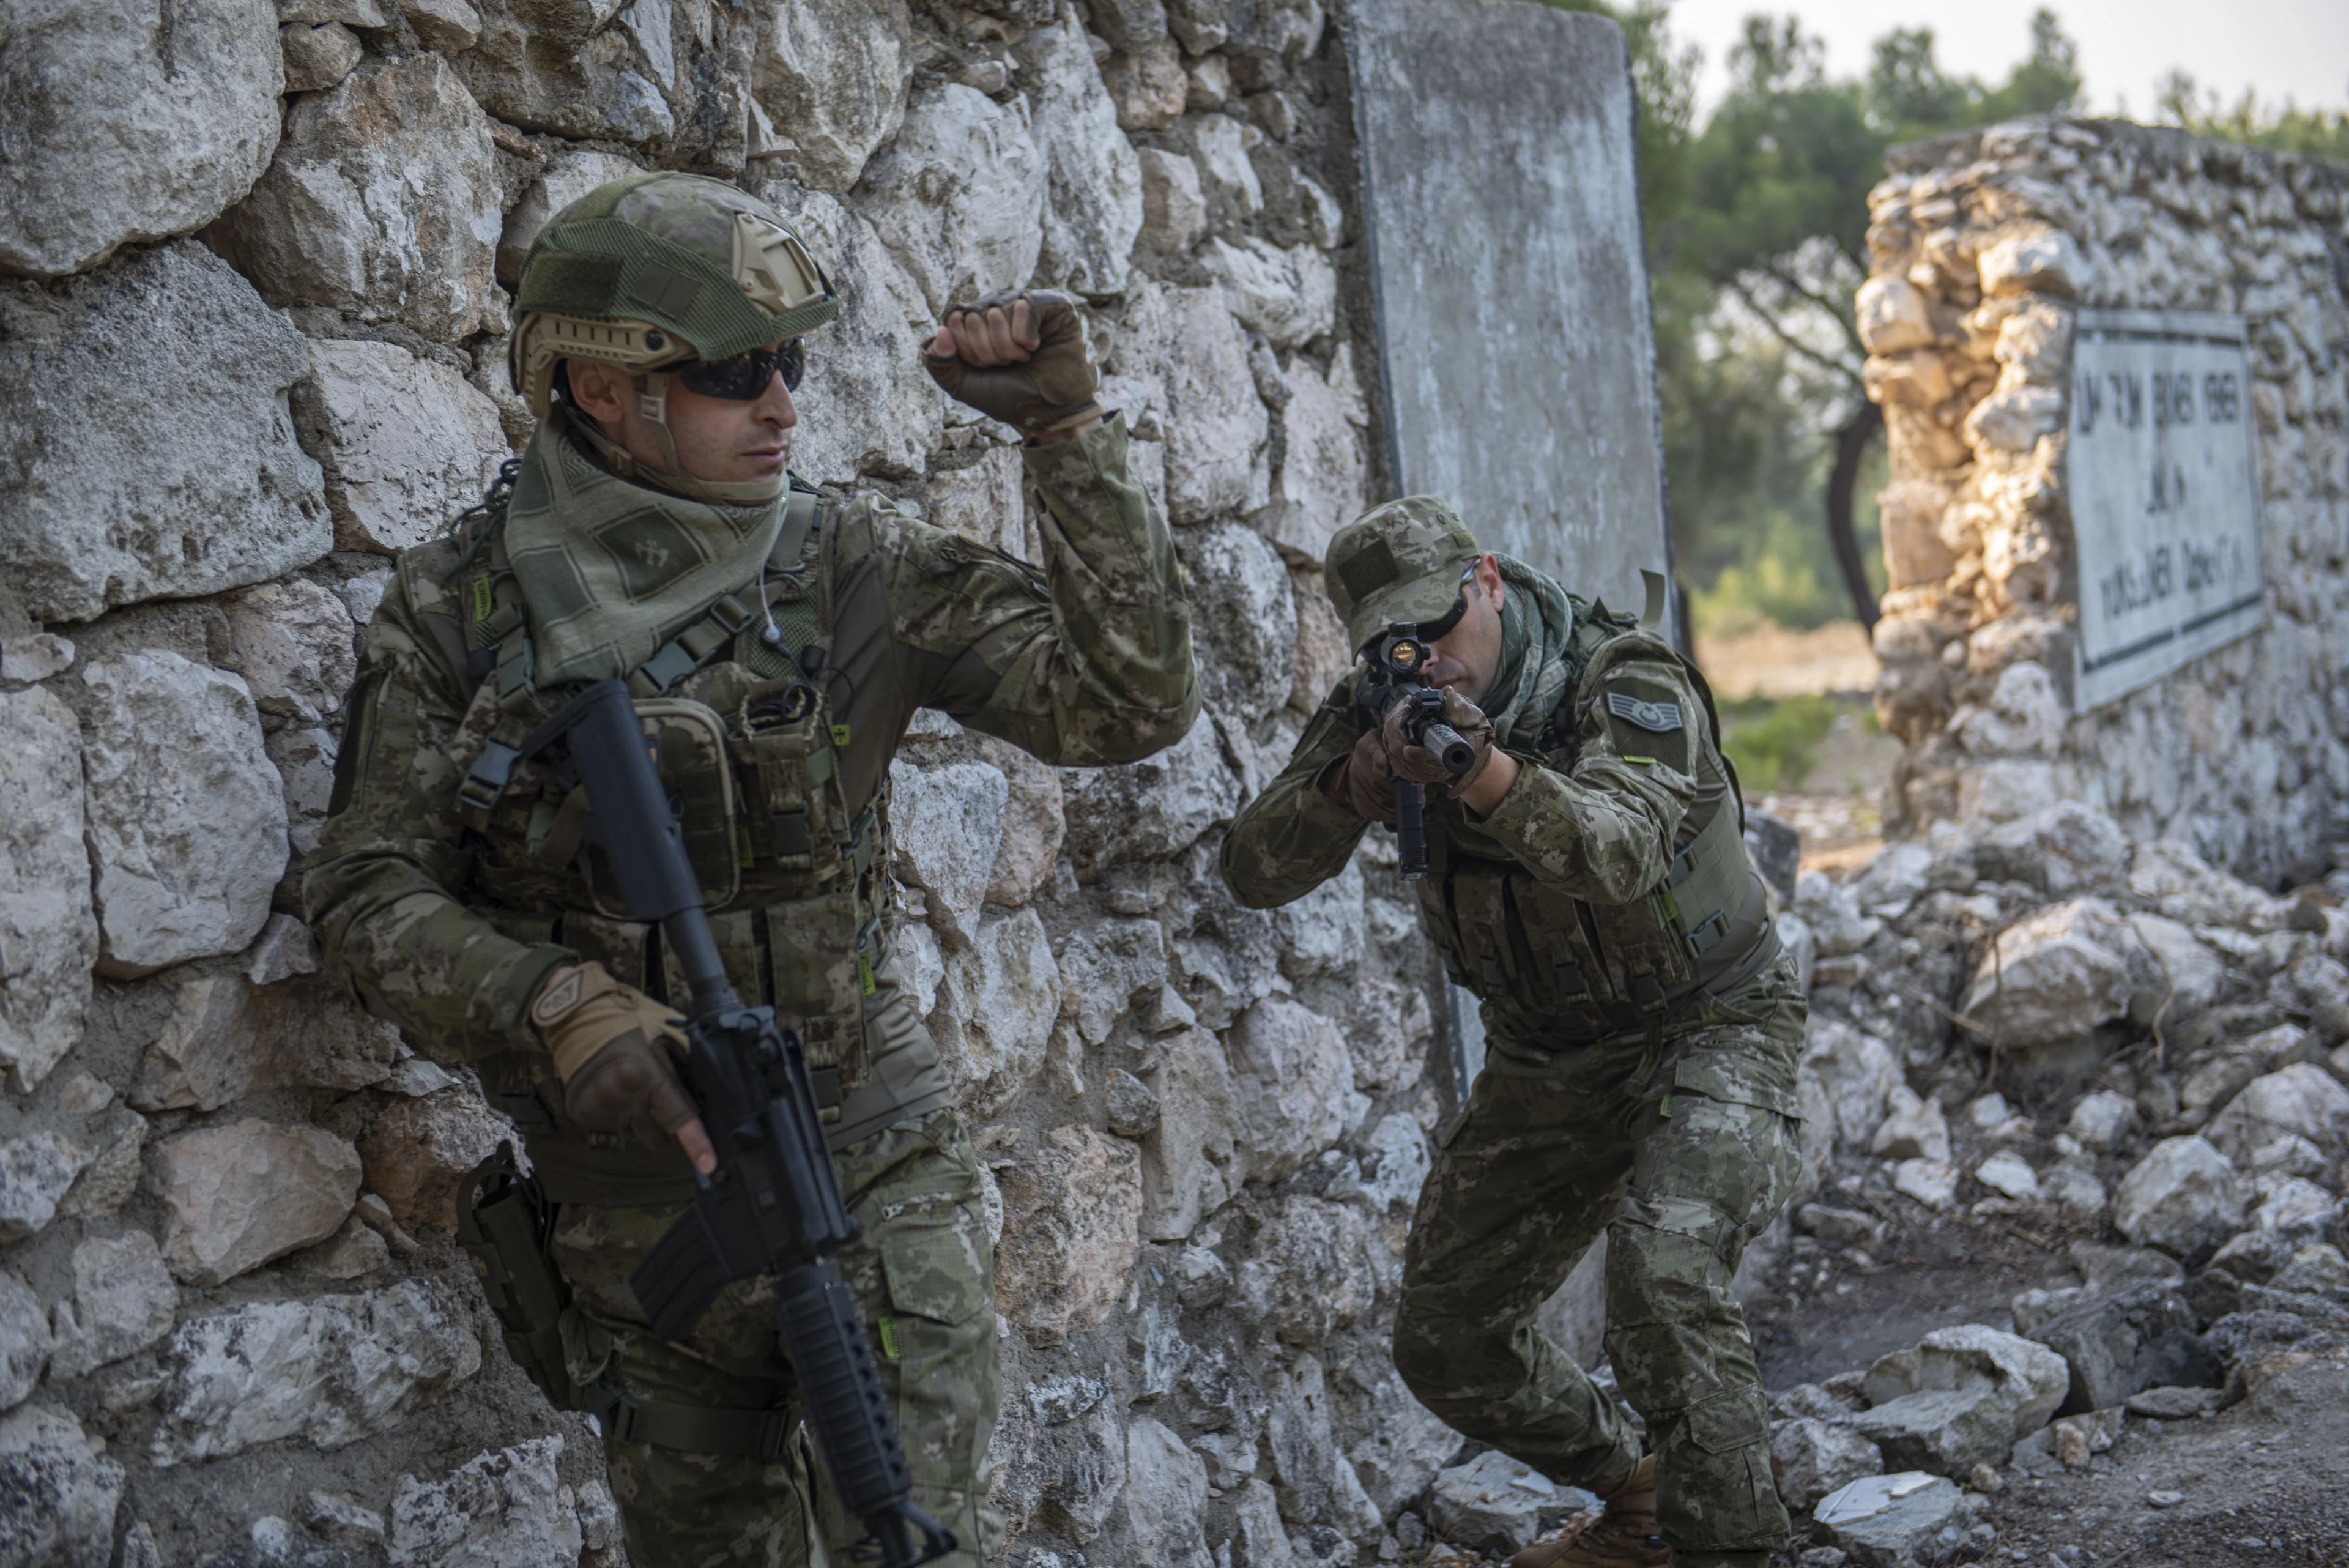
Wearing the vest correctly is vital because it ensures that the plates stay in the correct position. The front plate should start just below the collarbone and the rear plate should properly cover the spine line. Otherwise, gaps appear in the protection area. Shoulder straps adjusted to the correct height are especially important when used with a backpack, since they balance pressure and do not restrict breathing.
A properly worn and adjusted assault vest supports mission tempo. Real performance begins with equipment that truly fits the body.
What to Consider When Choosing an Assault Vest?
Choosing the right assault vest directly affects safety and mobility during a mission. Picking a model just because it has many pouches is not enough. Material quality, plate compatibility, ergonomics and long term comfort are the core criteria.
First, the durability of the materials should be checked. Licensed CORDURA fabric, YKK buckles and high strength webbing ensure that the vest maintains its shape and functionality under harsh field conditions.
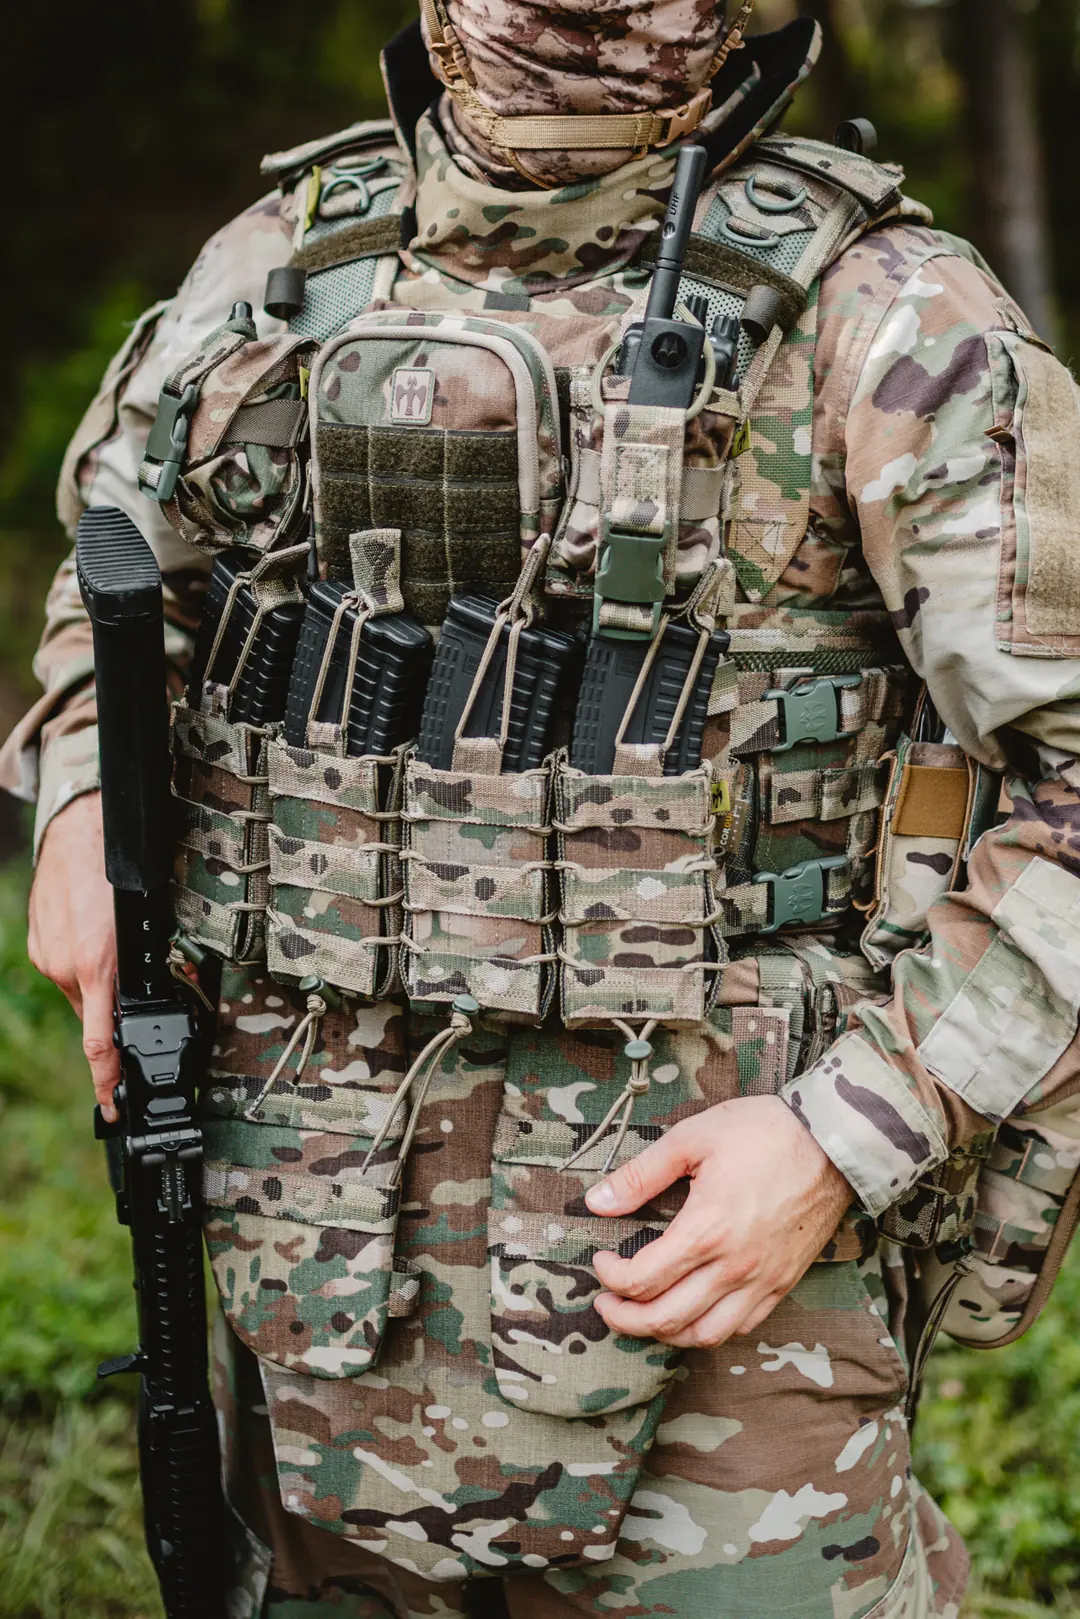
One of the most important criteria is the design of the plate compartments. Plate pockets that can accommodate all standard plate sizes and hold them tightly in place prevent sagging and provide a secure protection area. This structure is critical not only for ballistic protection, but also for balancing weight across the body. Shoulder design is equally decisive. Shoulders that distribute load evenly increase comfort, especially during prolonged use with a backpack or rifle.
The inner surface of the vest is another key element. Three dimensional mesh fabric reduces sweating and provides airflow during long missions. This prevents the vest from sticking to the body and restricting movement in hot weather. The MOLLE/PALS system gives the user the freedom to structure their pouches exactly according to mission needs.
The combination of durability, comfort and functionality defines the right assault vest. Real performance starts with a solid baseline choice.
How to Wear an Assault Vest Correctly?
Wearing an assault vest correctly does more than provide comfort. It optimizes the protection area and directly impacts mission performance. For the vest to sit in the correct position on the body, shoulder height, chest tension and waist adjustment must work together. These three parameters prevent the vest from sliding, riding up or swinging sideways during movement.
The correct process starts with basic alignment of the shoulder straps. The front plate must begin at collarbone level and fully cover vital organs. This height maximizes ballistic protection and prevents the vest from restricting breathing when sitting, standing up or crouching. If the shoulders are tightened too much, movement is restricted. If they are too loose, the vest sags.
Chest and waist adjustments ensure that the vest hugs the body. The goal is not to make the vest tight, but to make it stable. Over tightening makes breathing difficult and increases fatigue during long missions. Loose adjustment leads to imbalance during running, climbing or vehicle movements.
Once the vest fits the body properly, a movement test must be performed. When the arms are raised, when bending forward and during light running, the vest should maintain its position. A correctly worn assault vest carries weight evenly, increases protection and stays in sync with mission tempo. Real comfort begins with correct positioning.
1. Adjusting the Shoulder Straps
Shoulder straps are one of the most critical adjustment points of an assault vest. They directly determine plate height, the center of balance and pressure distribution on the torso. Incorrectly adjusted shoulder straps can cause the plate to sit too low, make the vest swing forward and back during movement or overload the shoulders during long use. This makes careful adjustment essential.
The first step is to raise the shoulder straps evenly on both sides after putting on the vest. The front plate should start just below the collarbone, bringing the protection zone to the correct position. At this height, running, squatting, climbing or entering and exiting vehicles do not restrict breathing and do not push the vest upward.
Ergonomic shoulder strap design is a major advantage. When used together with a backpack or rifle sling, evenly distributed pressure prevents shoulder fatigue. Three dimensional mesh lining and anti slip webbing reduce friction and sweating during long missions and improve comfort.
After adjustment, symmetry between both shoulders should be checked. The vest should sit level without tilting to one side. The user can walk a few steps, bend, straighten and reach for equipment to test the correct strap tension.
Properly adjusted shoulder straps increase both protection level and mission efficiency. True stability begins with the support the vest takes from the shoulders.
2. Chest and Waist Strap Tension
The chest and waist straps of an assault vest secure it to the body. Adjustments in these areas prevent the vest from shifting, opening to the sides or riding upward during movement. Correct tension makes the vest hug the body but must never restrict breathing. The aim is stable, not tight.
When adjusting the chest strap, the two plate panels should align naturally. This alignment helps the vest remain balanced during running, stair climbing and bending. If the strap is too tight, it restricts chest expansion and disrupts breathing rhythm. If too loose, the vest slides side to side and swings while moving. The ideal setting leaves slight room when taking a deep breath.
Waist straps control the lower part of the vest. Proper tension in this area prevents the vest from pulling down under its own weight or bouncing upward while running. A well set waist strap allows equipment weight to be distributed evenly along the torso. High strength webbing and anti slip surfaces offer major advantages during long missions.
After adjustment, the user should walk, jog lightly and make left right turns to check strap stability. Correct chest and waist tension preserves vest integrity and provides a rhythm friendly balance during missions.
3. Performing a Movement Test
Once the shoulder, chest and waist adjustments are complete, the most important step is the movement test. This is the most reliable way to check whether the vest is compatible with real mission tempo. Even if the adjustments look correct, small shifts, pressure points or imbalances during movement can only be detected through a dynamic test.
In the first stage, the user raises both arms fully overhead, reaches forward and sideways and rotates the torso. During these movements, the vest must not ride up, slip off the shoulders or lose plate position. If the vest presses into the chest when raising the arms, shoulder straps are too tight. If it pulls downward, they are too loose.
In the second stage, short distance running, squats and quick direction changes must be practiced. This reveals whether the vest swings and whether the waist straps provide sufficient stability. A balanced vest makes access to equipment easier and does not fatigue the user.
The final step is the equipment access test. While reaching for magazines, a radio or mission tools, the vest should not create excessive friction or tension.
A properly executed movement test confirms that the vest is ready for mission conditions. Real compatibility reveals itself in motion.
How to Arrange Pouches and Accessories on an Assault Vest?
The performance of an assault vest depends not only on correct wearing but also on the proper placement of pouches and accessories. Equipment placement directly affects reaction speed, mission efficiency and balance control during movement. Layout should be done on a modular structure tailored to the user. MOLLE/PALS systems on modern assault vests allow each item to be positioned according to individual needs.
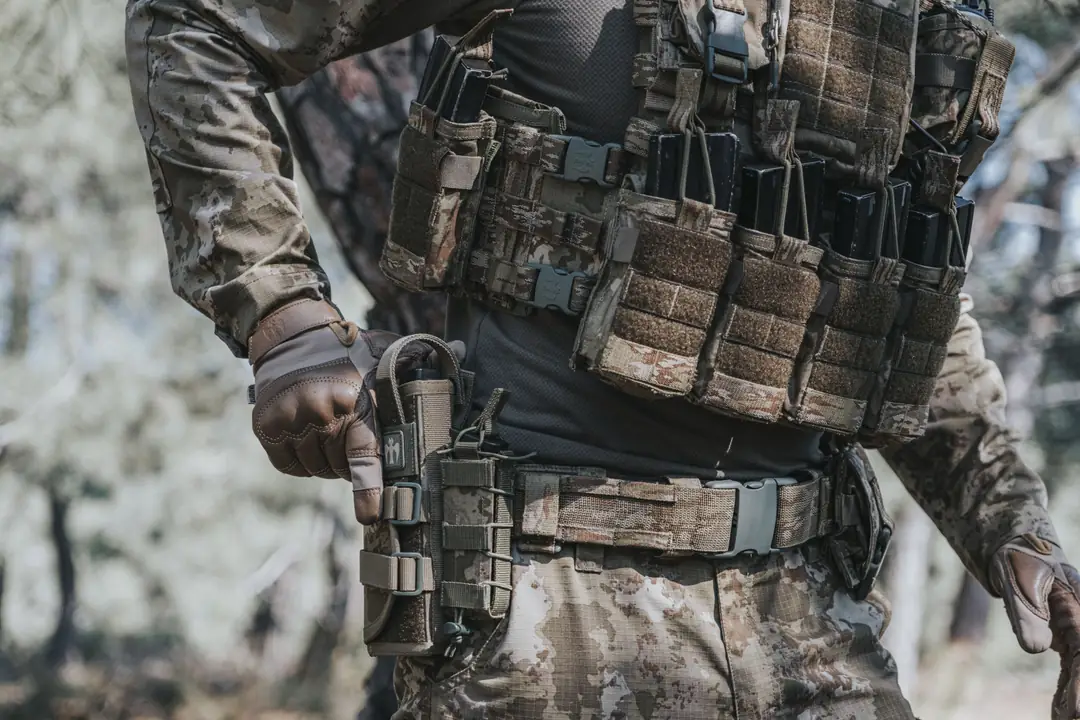
The core principle is that frequently used items are placed on the chest and front torso, while critical quick access gear stays on the dominant hand side. For example, magazine pouches are often placed on the non dominant side so that the dominant hand remains free for weapon control. Using dedicated pouches for radio, tourniquet, multitool or flashlight reduces clutter and speeds up reflex actions.
Weight distribution must also be considered. If load is concentrated on one side, the vest will gradually tilt and cause body fatigue during long missions. Equipment should be balanced as close as possible to the centerline of the torso.
Tight plate compartments and robust webbing ensure that the vest retains its shape even with fully loaded pouches. This structure prevents sagging and swinging during movement.
Correctly placed pouches support mission tempo without tiring the user. Real organization is when needs are met in the fastest possible way.
Adjustment Recommendations Based on Use Scenarios
An assault vest is not adjusted the same way for every user. Mission type, equipment load, weather conditions and movement tempo all influence how the vest should be configured. There is no single adjustment template. Instead, different scenarios require optimized settings.
For close quarter operations, a tighter fit is preferred. This prevents equipment from bouncing during running, rapid direction changes and indoor movements. Shorter shoulder adjustment keeps the plate centered. Keeping pouches close to the torso reduces snagging on doors and in tight spaces.
In open terrain missions, breathability and long term comfort are prioritized. Shoulder and waist adjustments should not be overly tight. Some flexibility must be left to avoid restricting circulation. The compatibility of the vest with base layers should be checked to benefit fully from the airflow provided by the three dimensional mesh lining.
In vehicle based missions, shoulder adjustments may be slightly loosened to avoid upward pressure while seated. Waist straps should not be over tightened to maintain comfort during prolonged sitting. Front mounted radio, flashlight or tourniquet pouches should not create excessive bulk that interferes with steering wheels or seats.
For heavy load missions, balanced weight distribution is critical. Chest and waist adjustments must be symmetrical and the centerline of the vest maintained to prevent side shifting.
A vest tuned to the mission scenario does not tire the user. It adapts to the rhythm of the task. True optimization is the adjustment made according to conditions.
Common Mistakes When Wearing an Assault Vest
The performance of an assault vest reaches its maximum when it is adjusted correctly. However, many users lose its advantages due to seemingly minor mistakes. These errors reduce mobility and create unwanted gaps in coverage.
One of the most common mistakes is adjusting the shoulder straps too loose or too tight. Loose settings let the plate slide downward and shake while walking. Over tightened straps restrict breathing and increase fatigue in long missions. The correct height is where the front plate starts just under the collarbone.
Another frequent mistake is uneven tension of chest and waist straps. This causes lateral shifting, unbalanced weight distribution and swinging while running. Straps should be symmetrical and neither too tight nor too loose.
Errors in pouch placement can also cause serious problems. Overloading the vest with unnecessary pouches increases weight and restricts movement. Positioning frequently used equipment on the wrong side reduces reaction speed. The flexibility of the MOLLE/PALS system must be used wisely and pouches arranged according to mission priorities.
Skipping the movement test before deployment is another critical mistake. Looking correct in a mirror is not enough. The vest’s reaction to real movement tempo must be tested.
Finally, some users confuse plate carriers with full ballistic vests and choose the wrong system. If mission requirements are not analyzed properly, the vest may end up unnecessarily heavy and functionally unsuitable.
Correct use begins with recognizing mistakes. True efficiency comes from the attention given to adjustment.
Some equipment only protects. Some only adds speed. An assault vest must do both at the same time. When adjusted correctly, it becomes a silent, balanced and almost invisible support. Real superiority appears when equipment is fully aligned with the user.